Viewing Images
Viewing Image Data within ImageJ2 Java Code Brian Northan, True North Intelligent Algorithms LLC
Viewing Images
Goals
- Learn to show images within Java programs using both ImageJ1 and ImageJ2
- Learn to access ImageJ1 Visualization routines from your java program
- Learn how to use ImageJ2 API (ops, imglib2, Views, etc.) for basic visualization
- Ops and Imglib2 will be explained in detail in later sessions
- Learn to display multidimensional and complex data
- Basic use of imglib2 to render data
Example 1 Open and Display Images
- Open Image using IJ1 and IJ2 API
- Open up an Image Display inside programs
- Display result of command using annotation
Start ImageJ
// create an instance of imagej
final ImageJ ij = new ImageJ();

// launch it
ij.ui().showUI();
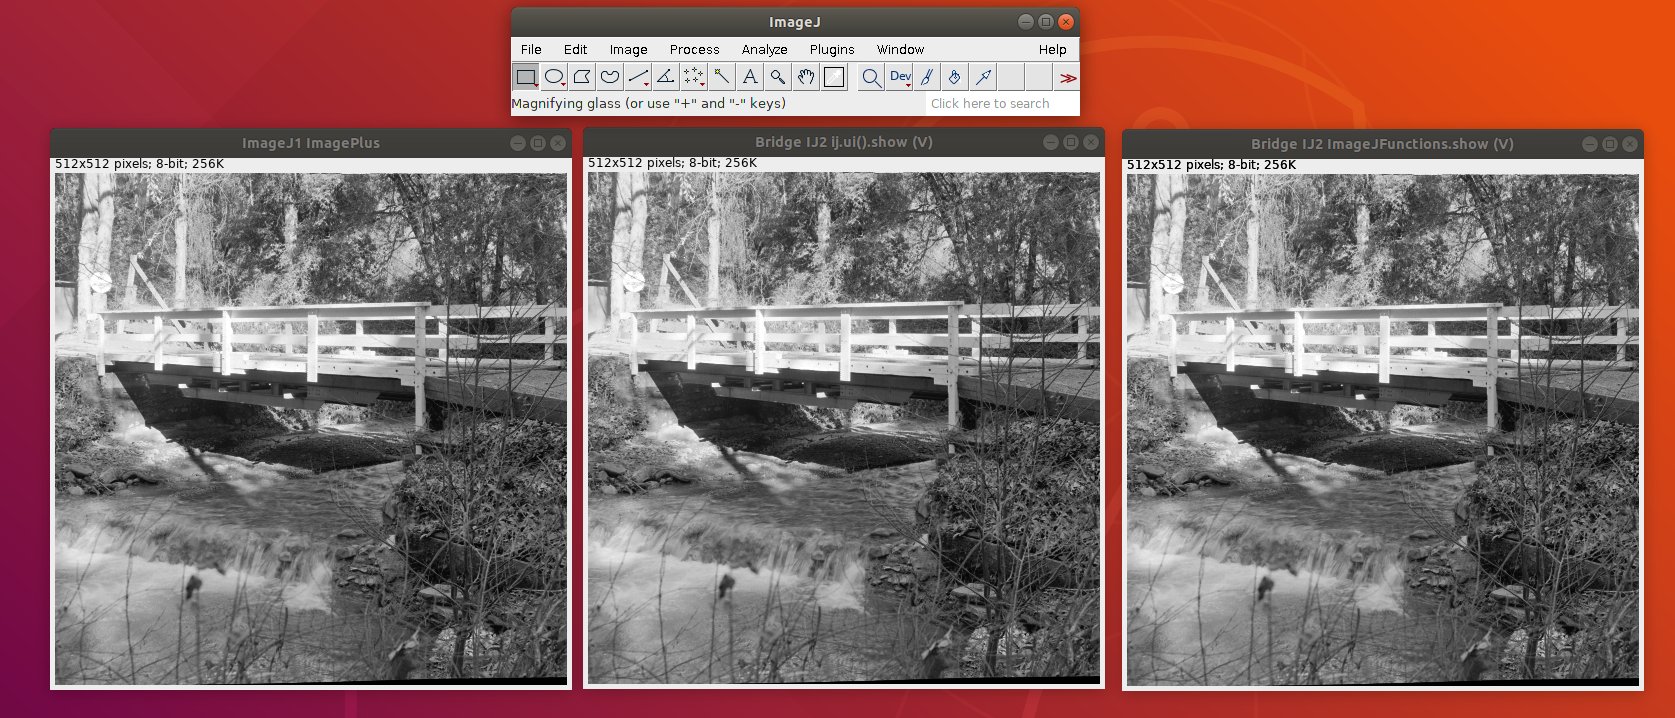
Open Some Image Data
- ImageJ1 ImagePlus
- ImageJ2 Dataset
// get bridge as IJ1 ImagePlus (imp)
ImagePlus impBridge = IJ.openImage("../images/bridge.tif");

// get bridge as IJ2 Dataset
// Dataset
Dataset datasetBridge = (Dataset) ij.io().open("../images/bridge.tif");
Display Image using IJ1
// show the IJ1 ImagePlus
impBridge.show();
impBridge.setTitle("ImageJ1 ImagePlus");
Display Image using IJ2 UIService
// show the IJ2 Dataset
ij.ui().show("Bridge IJ2 ij.ui().show", datasetBridge);
Display Image using IJ2 ImageJFunctions
// show using imagej functions
ImageJFunctions.show((RandomAccessibleInterval) datasetBridge
	.getImgPlus()).setTitle("Bridge IJ2 ImageJFunctions.show");
Display output of Command
- Framework does it automatically
@Parameter(type = ItemIO.OUTPUT)
Img out;

@Override
public void run() {
	out = ops.create().img(in);
	ops.filter().addPoissonNoise(out, in);
}
Example 2 Mixed World
- Open Image and process using IJ2
- Display using IJ1 API
- Re-use legacy code to show a colormap
- Use IJ1 API for line profiles
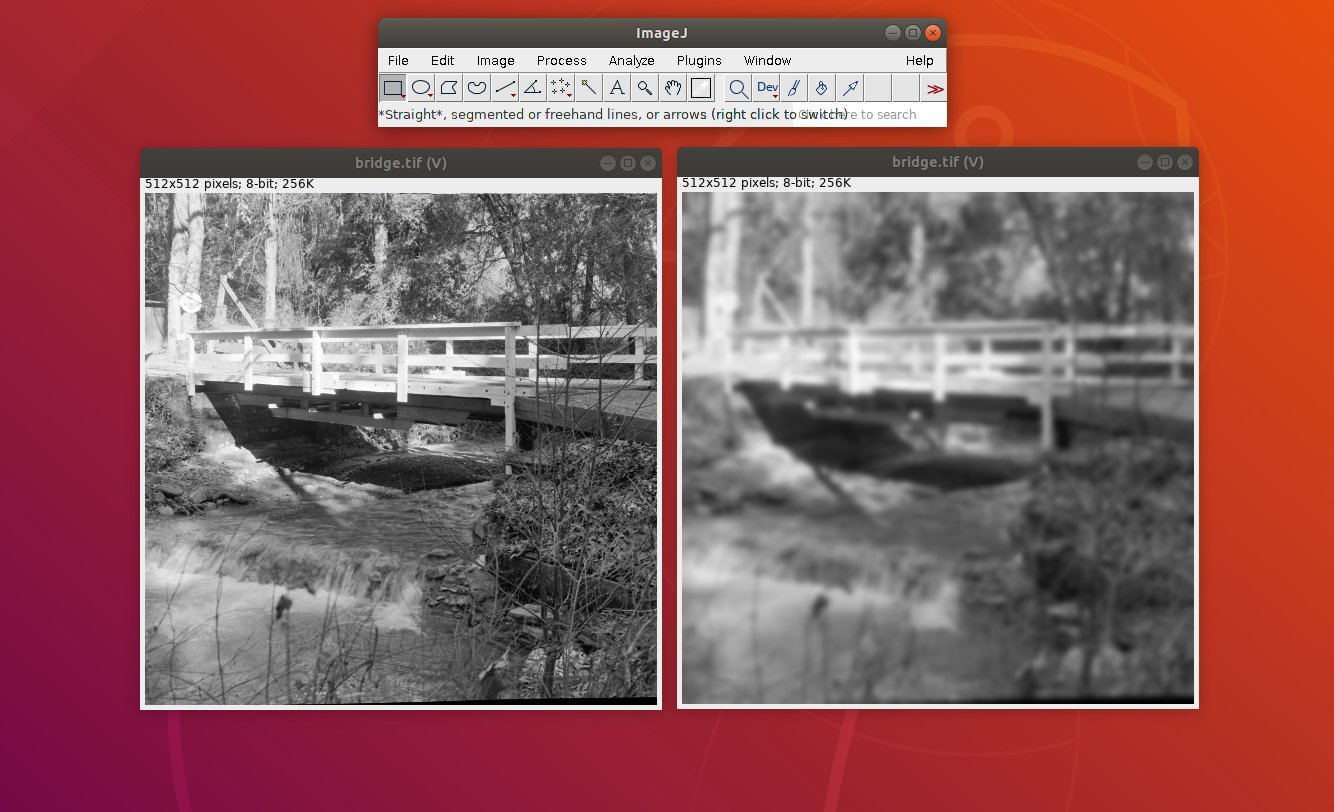
Start IJ, load image and blur it
- Use ImageJ-ops to apply Gaussian blur
- Ops is an extensible library for algorithms
- More on Ops next session...
// create an instance of imagej
final ImageJ ij = new ImageJ();

// launch it
ij.launch(args);

// get bridge as IJ2 Dataset
Dataset dataBridge = (Dataset) ij.io().open("../images/bridge.tif");

// blur the bridge
RandomAccessibleInterval blurred = ij.op().filter().gauss(
	(RandomAccessibleInterval) dataBridge, 3.0);
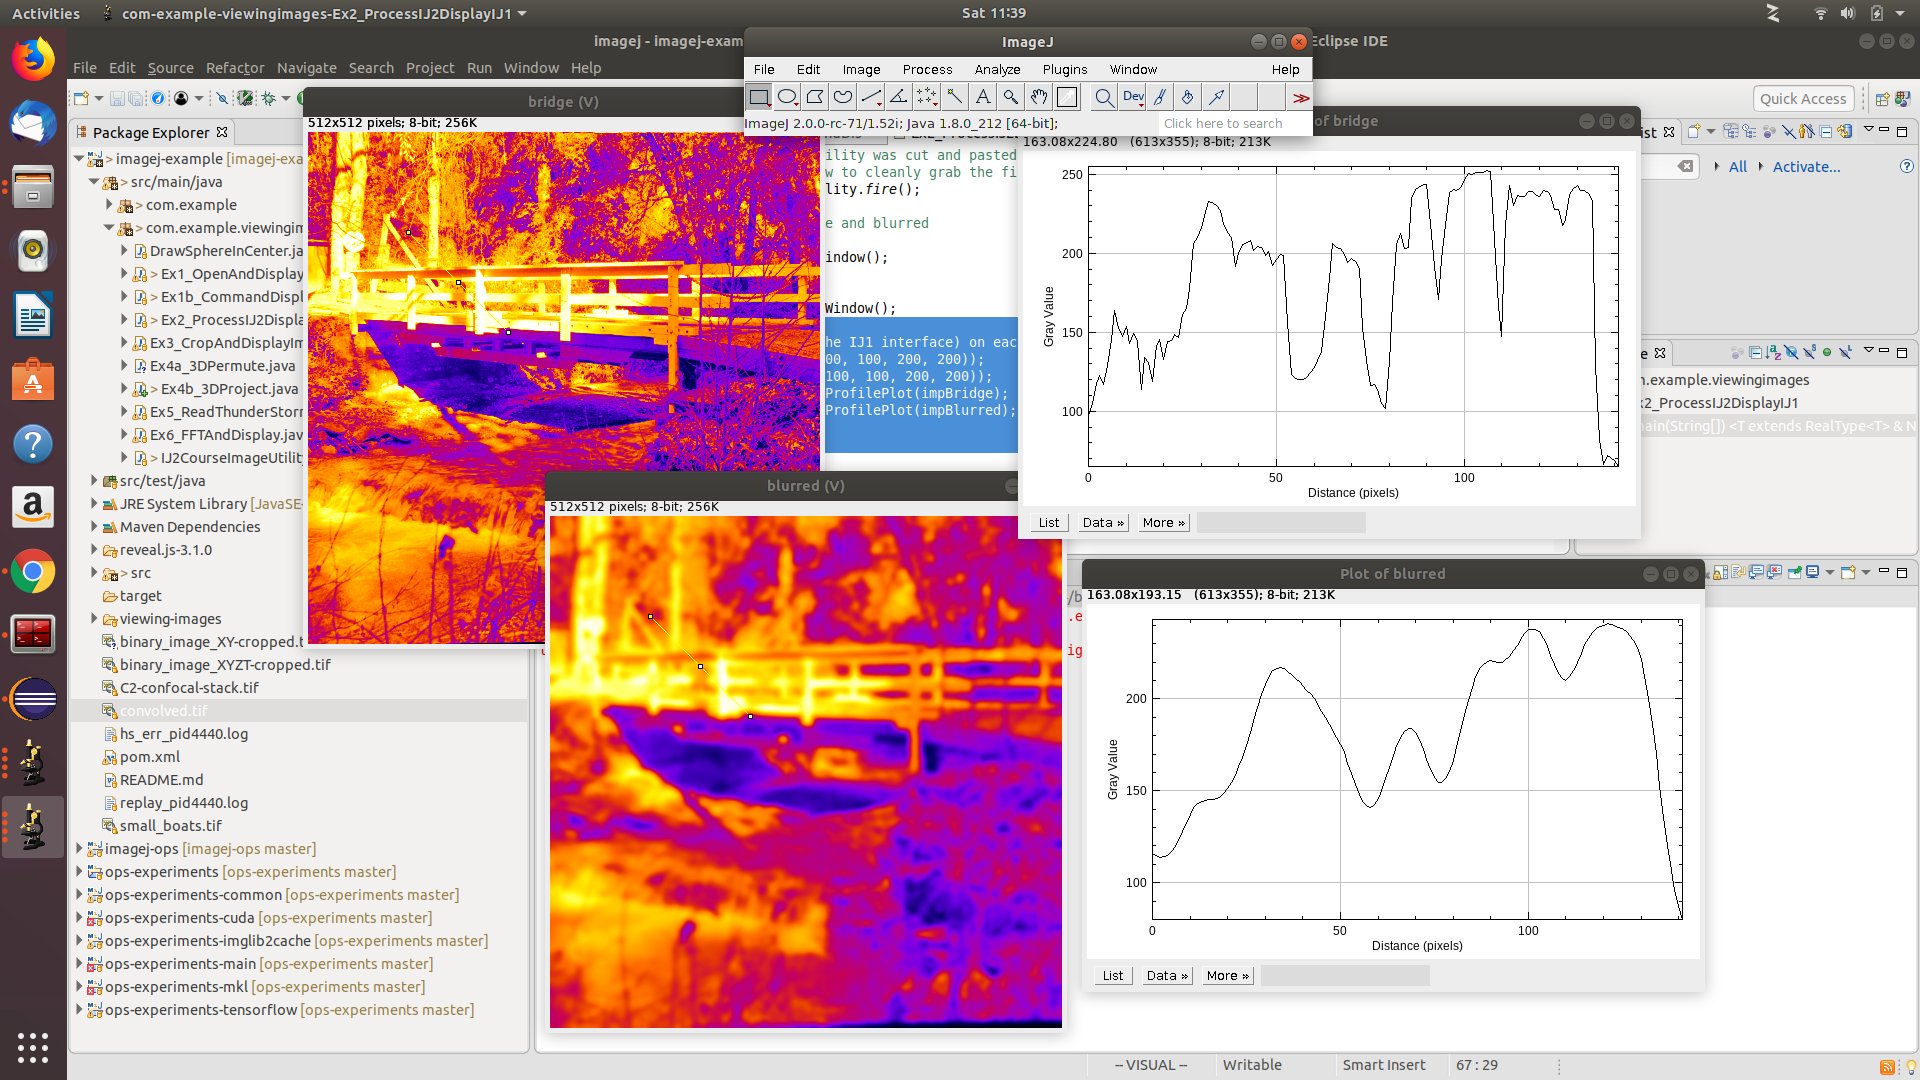
Convert to IJ1 and show...
// convert bridge to IJ1
ImagePlus impBridge = ImageJFunctions.wrap(
(RandomAccessibleInterval) dataBridge, "bridge");
// convert blurred to IJ1
ImagePlus impBlurred = ImageJFunctions.wrap(blurred, "blurred");

// show IJ1
impBridge.show();
impBlurred.show();
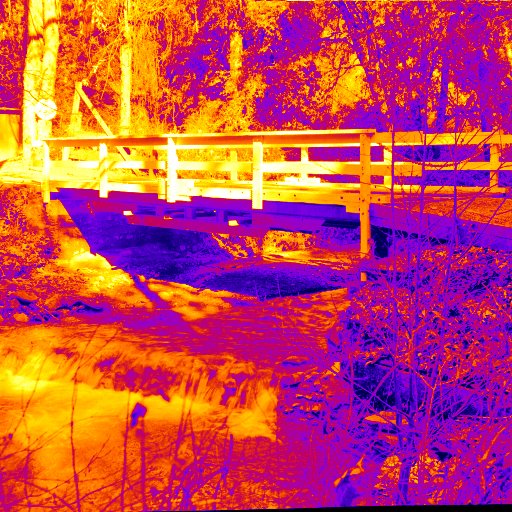
Scavenge 'fire' LUT from IJ1 LutLoader
- [Ctrl] [Shift] [T] then search for LutLoader
- Look for fire method (not public??)
- Scavenge fire and interpolate functions
// get the fire color map using the Utility
// (note the code in the Utility was cut and pasted from LutLoader
// I couldn't figure out how to cleanly grab the fire LUT from it....
LUT lut = IJ2CourseImageUtility.fire();

// set the LUT on the bridge and blurred
impBridge.setLut(lut);
impBridge.updateAndRepaintWindow();

impBlurred.setLut(lut);
impBlurred.updateAndRepaintWindow();
Use IJ1 API to draw line profiles
- Line profiles are useful for before and after comparisons
// now draw an ROI (using the IJ1 interface) on each image and plot it
impBridge.setRoi(new Line(100, 100, 200, 200));
impBlurred.setRoi(new Line(100, 100, 200, 200));
ProfilePlot plotter1 = new ProfilePlot(impBridge);
ProfilePlot plotter2 = new ProfilePlot(impBlurred);

plotter1.createWindow();
plotter2.createWindow();
- Run your favourite IJ1 routine
- Use Plugins->Macros->Record...(java)
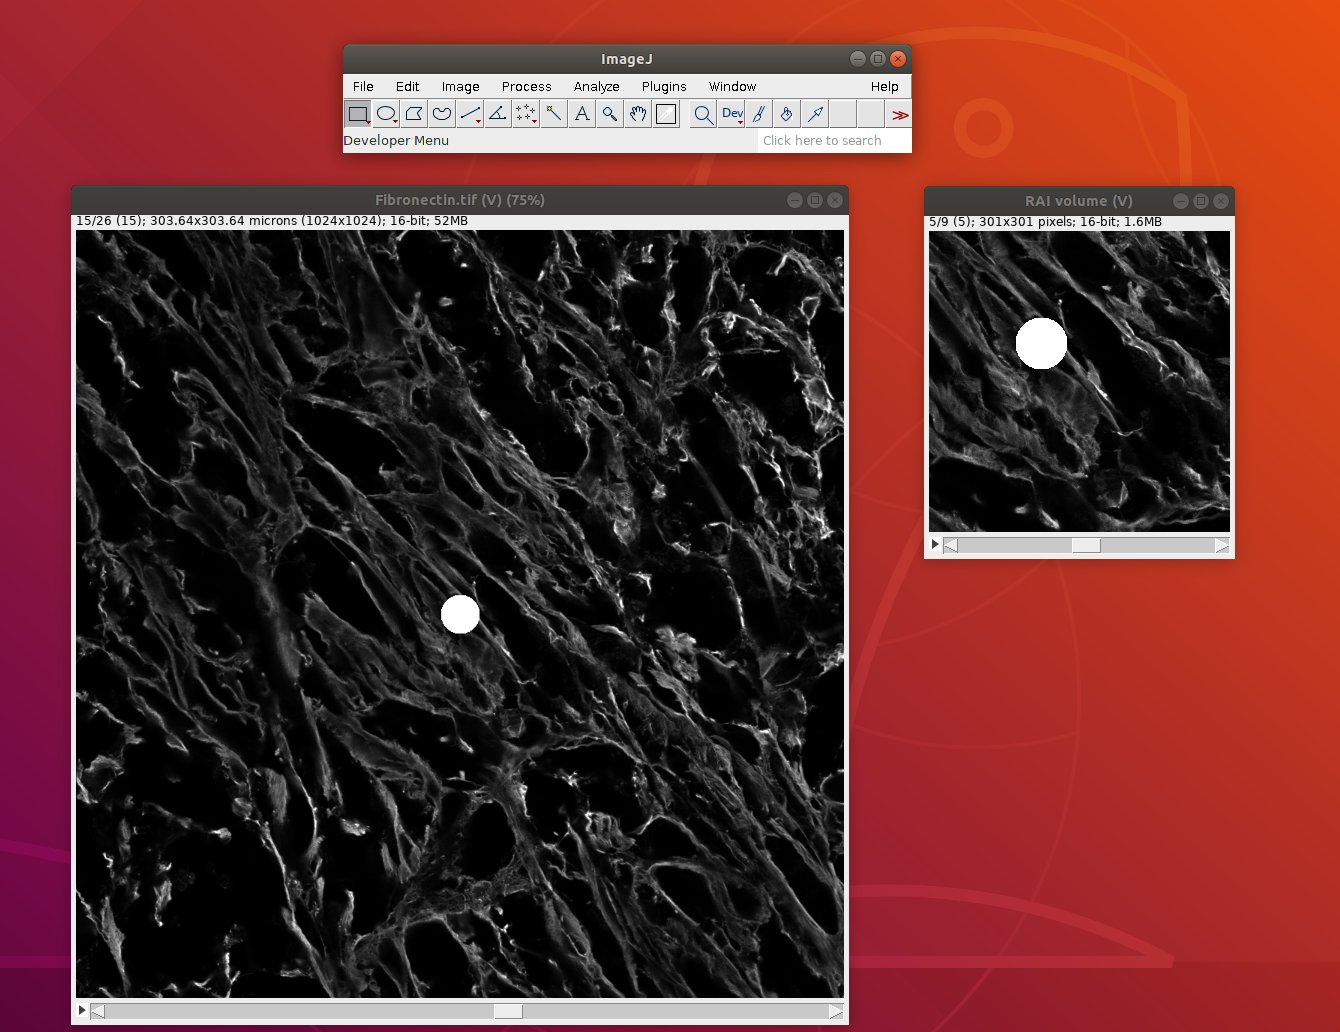
Example 3a Viewing cropped intervals
- Use ops to crop
- Alternatively use Views
- More on ops and Views in a later session
- Draw a sphere on the data
- What happens on the RAI?
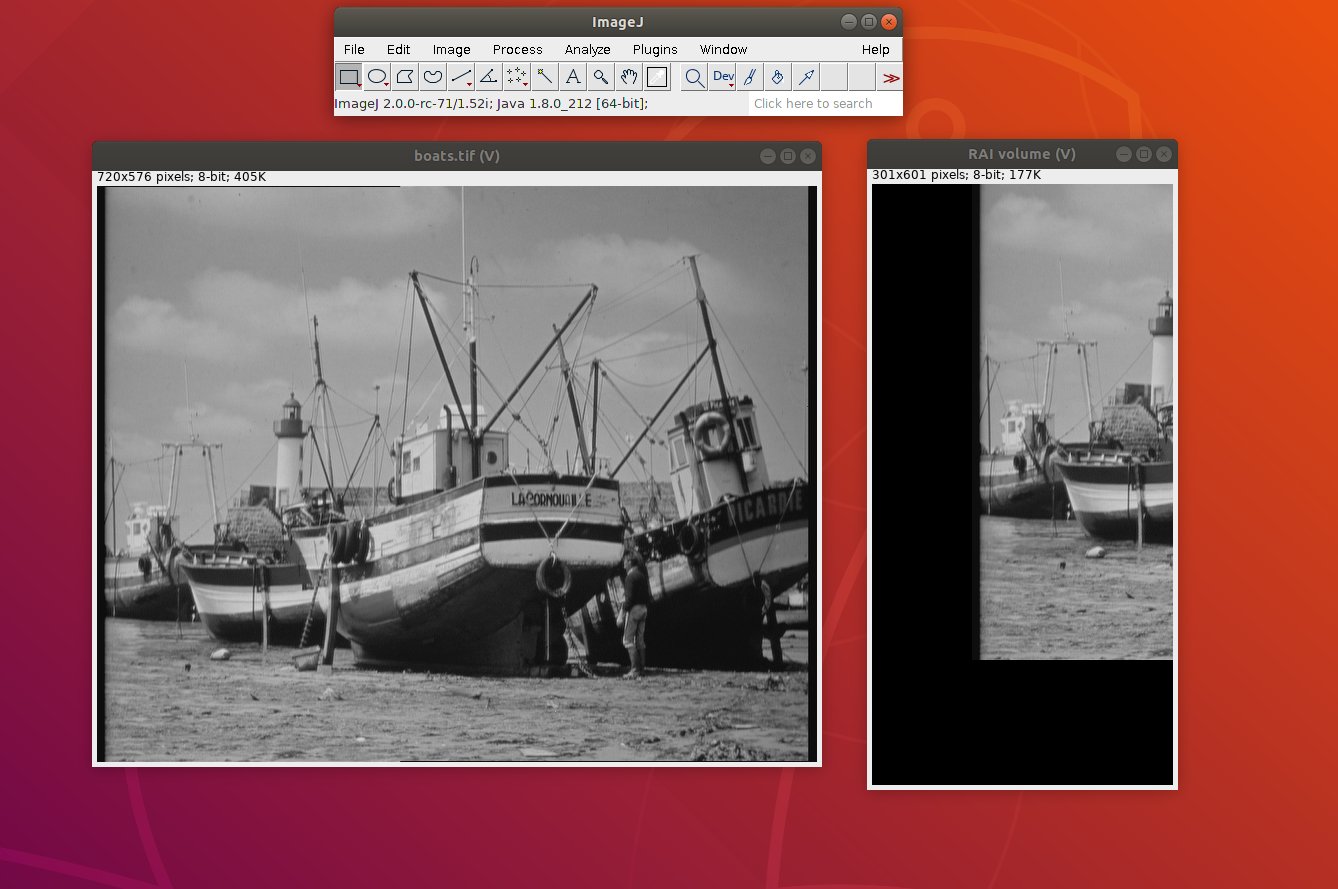
Interval interval = Intervals.createMinMax(100, 100, 20, 400, 400, 40);

// crop interval
RandomAccessibleInterval raiVolume = (RandomAccessibleInterval) ij
	.op().transform().crop(image, interval);


// alternatively you can use Views directly
RandomAccessibleInterval rai2 = (RandomAccessibleInterval) Views
	.interval(image, interval);

// display the image
ij.ui().show("RAI volume", raiVolume);
- Note "ops time" and "views time"
- Why are they different?"
Draw Sphere Command
@Plugin(type = Command.class,
	menuPath = "Plugins>Learnathon>Draw A Sphere (IJ2)")
public class DrawSphereInCenter & NativeType>
	implements Command
{

	@Parameter
	OpService ops;

	@Parameter
	Img img;

	@Override
	public void run() {
		final Point center = new Point(img.numDimensions());

		for (int d = 0; d < img.numDimensions(); d++)
			center.setPosition(img.dimension(d) / 2, d);

		long radius = Math.min(img.dimension(0), Math.min(img.dimension(1), img
			.dimension(2)));

		T intensity = ops.stats().max(Views.iterable(img));

		HyperSphere hyperSphere = new HyperSphere<>(img, center, radius);

		for (final T value : hyperSphere) {
			value.setReal(intensity.getRealFloat());
		}
	}
}
Example 3b Out of bounds?
What if the Interval is out of bounds
Interval interval = Intervals.createMinMax(-100, 100, 200, 700);

// Try cropping with an interval that goes out of bounds...
RandomAccessibleInterval rai = (RandomAccessibleInterval) Views
	.interval(image, interval);

// try again but extend image... (comment out above code, comment in this code)
//RandomAccessibleInterval rai = (RandomAccessibleInterval) Views
	//	.interval(Views.extendZero(image), interval);

// display the image
ij.ui().show("RAI", rai);
Try again...
Interval interval = Intervals.createMinMax(-100, 100, 200, 700);

// Try cropping with an interval that goes out of bounds...
//RandomAccessibleInterval rai = (RandomAccessibleInterval) Views
//	.interval(image, interval);

// try again but extend image... (comment out above code, comment in this code)
RandomAccessibleInterval rai = (RandomAccessibleInterval) Views
		.interval(Views.extendZero(image), interval);

// display the image
ij.ui().show("RAI", rai);
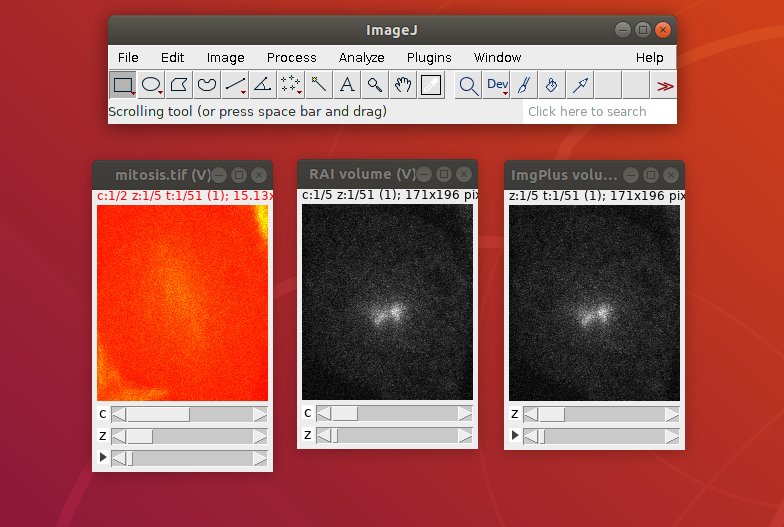
Example 3c crop hyperslice
Show axis info using dimension index
for (int d = 0; d < image.numDimensions(); d++) {
	ij.log().info(image.axis(d).type());
	ij.log().info(image.dimension(d));
	ij.log().info("");
}
Show axis size using axis enumeration
int xIndex = image.dimensionIndex(Axes.X);
int yIndex = image.dimensionIndex(Axes.Y);
int zIndex = image.dimensionIndex(Axes.Z);
int cIndex = image.dimensionIndex(Axes.CHANNEL);
int tIndex = image.dimensionIndex(Axes.TIME);

long xLen = image.dimension(image.dimensionIndex(Axes.X));
long yLen = image.dimension(image.dimensionIndex(Axes.Y));
long zLen = image.dimension(image.dimensionIndex(Axes.Z));
long cLen = image.dimension(image.dimensionIndex(Axes.CHANNEL));
long tLen = image.dimension(image.dimensionIndex(Axes.TIME));
Crop Hyperslice using axis index and position
// we can use Views to get a hyperslice using a dimensions index and position
RandomAccessibleInterval raiViews = (RandomAccessibleInterval) Views
	.hyperSlice(image, cIndex, 0);
Convert to ImgPlus and set axis
// display the image... note that something isn't quite right
ij.ui().show("RAI volume", raiViews);

// the cropped section is an RAI. To get it to display correctly we need to
// use the dtaasetservice to convert it to an ImgPlus with ocrrect axis
DatasetService datasetService = ij.dataset();
AxisType[] axisTypes = new AxisType[] { Axes.X, Axes.Y, Axes.Z,
	Axes.TIME };
ImgPlus imgPlusVolume = new ImgPlus(datasetService.create(raiViews), "image",
	axisTypes);

// now the viewer should display the image with correct axis
ij.ui().show("ImgPlus volume", imgPlusVolume);
Example 4a Permutions
Permute (Reslice) using Views to see xz slices
- last 2 parameters are 'from' and 'to'
- Switch 1 (y) and 2 (z)
IntervalView dataXZY = Views.permute((RandomAccessibleInterval) data,
	1, 3);

ij.ui().show("Data XZY", dataXZY);

Example 4b Projections
Projections using ops
long[] projectedDimensions = new long[imgPlus.numDimensions() - 1];

int projectedDimensionIndex = imgPlus.dimensionIndex(ax);

int i = 0;

for (int d = 0; d < imgPlus.numDimensions(); d++) {
	if (d != projectedDimensionIndex) {
		projectedDimensions[i] = imgPlus.dimension(d);
		i++;
	}
}

Img projection = ops.create().img(new FinalDimensions(
	projectedDimensions), imgPlus.firstElement());

UnaryComputerOp, T> projector = Computers.unary(ops, projectType,
	projection.firstElement(), imgPlus);

return ops.transform().project(projection, imgPlus,
	(UnaryComputerOp) projector, projectedDimensionIndex);
Example 5 - Rendering points
- By the end of the week you should be able to...
- Use imglib2 to render points as Gaussian
- Use Cursors to loop through data (pixels and more...)
- Understand how to get and set 'Types'
- Understand how to perform operations on 'Types'
- This code adds a Gaussian to an image
- May not make sense yet...
- It should by the end of the week
// get the RAI to draw the Gaussian in
RandomAccessibleInterval rai = Views.interval(img,
	new FinalInterval(start, end));

Cursor c1 = Views.iterable(Views.zeroMin(rai)).cursor();
Cursor c2 = Views.iterable(guassian).cursor();

while (c1.hasNext()) {
	c1.fwd();
	c2.fwd();

	c1.get().add(c2.get());
}
- Synaptic Clefts (from Jon Bogovic)
- More to come with this data next session...
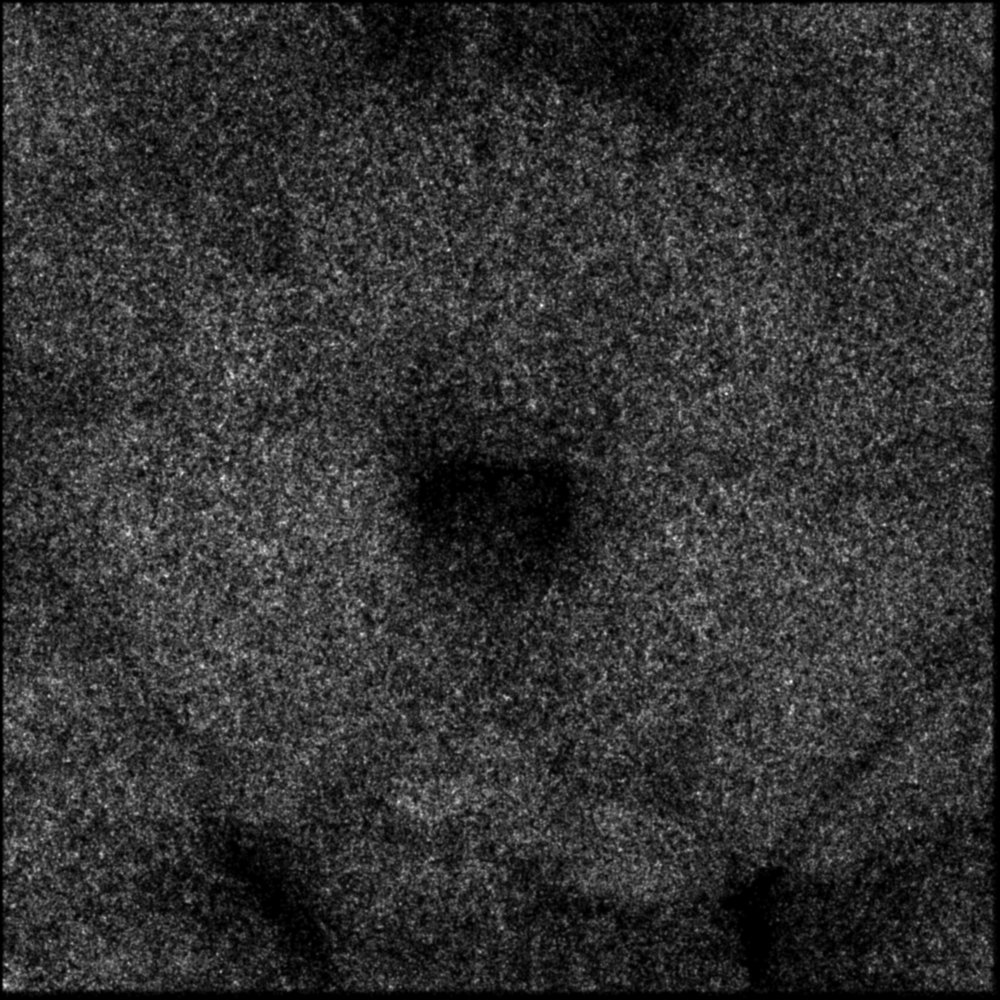
Example 6 - Complex Numbers
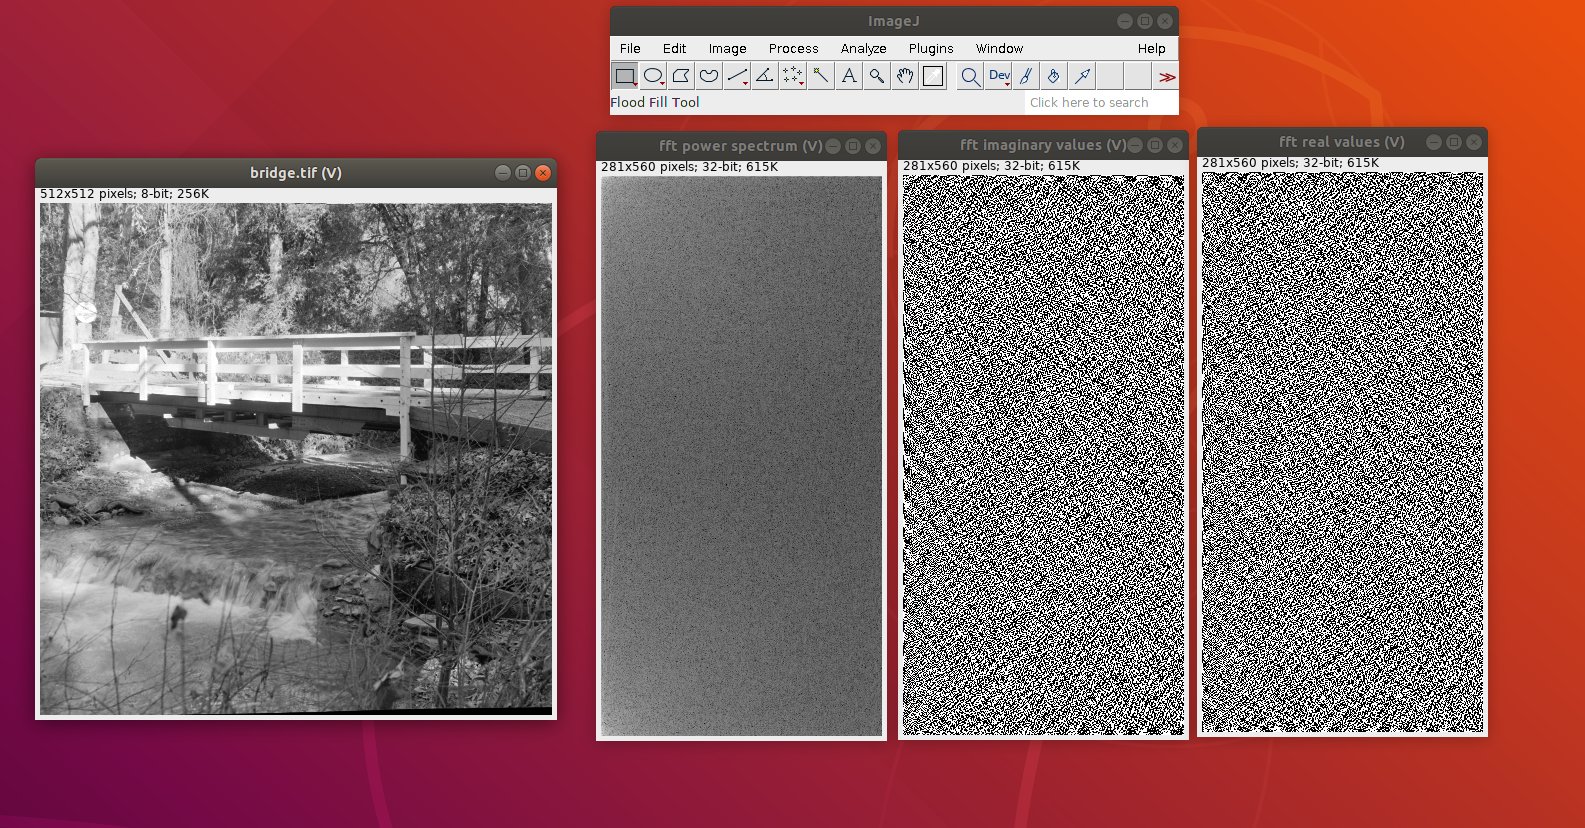
Perform FFT using ops, Display real and complex parts
RandomAccessibleInterval fft=ij.op().filter().fft(impBridge);

// default is power spectrum
ImageJFunctions.show(fft).setTitle("fft power spectrum");
// real values
ImageJFunctions.show(fft, new ComplexRealFloatConverter()).setTitle("fft real values");
// imaginary values
ImageJFunctions.show(fft, new ComplexImaginaryFloatConverter()).setTitle("fft imaginary values");
- Perform an FFT and show complex and real parts